Sunday 31 May 2015

A Candy Note Holder


Hello...

Yesterday I was lucky enough to visit lovely craft shop in Kings Lynn called Sprinkle Twinkle to demonstrate all of the lovely Craft Asylum products.  In the afternoon all 18 ladies took part in a make & take I had designed using the latest Candy range.


This is a great little projects for craft groups or make & take sessions.   I am always amazed at how so many people can make each project different even though they are all using the same products.

Materials:
Notepad
Paper Clip
Pink Ink
Chipboard

Instructions:
1.  Take a 10cm x 10cm piece of chipboard and cover with the blue patterned paper.  Matt and layer coordinating paper on top.
2.  Trim white cardstock 8.5cm x 17cm.  Score at 8cm and 9cm.  This makes the holder for the post it note.
3.  Adhere the notepad inside and cover the front with the grey patterned paper.
4.  Stamp the word "everyday moments" onto a card section and adhere to the front of the post it note.
5.  Add two strips of paper banners and a clip.

Here is a picture of the ladies making their projects yesterday.  Everyone enjoyed themselves and they all took home a beautiful decorated notepad.


Thank you to all the lovely ladies that attended yesterday.  

That is it from me this week but I will be back again on Saturday with a new project to share.

Katie 


Saturday 23 May 2015

A Count Down Calendar


Hello ...

Happy weekend! Here in the UK we have a long weekend due to the bank holiday.  Fingers crossed we get some sunshine.

Talking of sunshine I have a post to share with you today using the Hello Sunshine collection.

As a family we have lots of exciting events to look forward to, whether that be birthdays or holidays.  So I thought I would create a framed count down picture with changeable numbers so that we can use it for all our important occasions.


To create the picture I have taken a white frame with an aperture.  Behind the aperture I have added 3 layers of coordinating patterned papers.  I have then die cut the panel that holds the number and layered it.  The beauty about using the Hello Sunshine 12 x 12" Paper Pad is the numbers come with it in the card elements, so all you need to do is trim around them.  The number has been added using a temporary adhesive so each day during the count down the number can be changed.  


To embellish the picture I have used a brad from the Hello Sunshine Embellishment Set and the bunting from the 12 x 12" Paper Pad. 

I have to say I am really happy with the way in which this turned out.  I think the colours work really well against the white frame.  I hope you like it too.

Have a lovely weekend.

Katie 

Monday 18 May 2015

A Candy notepad and plant wrapper

Spring looks like is full swing. the days are long and the sun is shinning - some days! And a notepad to write those everyday moments what  better than to decorate a plain and cheap notepad? Add to that a plat wrapper, perfect as quick personalised present.


 For this project I used Craft Asylum Candy 12"x12" Paper Pad and Craft Asylum Candy Clear Stamp Set.


First, I cover the cover and back cover using papers from the Candy pad.

To create the wrap, I attached one of the die cut long label to the back. I stamped the message from the Candy Clear stamps using black ink. 


Punch a scallop circle and a smaller plain one. Attach a thin magnet to the scallop, then attach one to the front making sure it matches to the one on the scallop. Cover it with the plain circle.
Then attach the message from the die cut sheet included in the 12 pad. Use another die cut, the banner, to use as a bookmark.


To quickly add some pizzazz to a plant pot, use a couple of die cuts from the 12" pad and glue it down. Quick and simple, it looks pretty!

Saturday 16 May 2015

Sunshine Card


Hello ...

How has your week been? 

Today I am looking on the positive side and sharing a card ready for all those hot summer days we are going to have! 


I really love working with the Hello Sunshine collection, the colours are so fresh.

To make this card I have covered the front with the blue patterned paper from the Hello Sunshine 12 x 12" Paper Pad and cut a heart into it.  Acetate has been added behind to create the shaker element and the sun has been adhered using a 3D foam pad.  I have placed a frame around the heart to set off the colours.  The words have been added using the Sizzix Thinlits Die Set Happiness Phrases which is currently one of my favourites.  I find it so useful for adding sentiments to general use cards.

I would love to see any cards you have made using this range.  Remember to share them with Craft Asylum on social media! 

Until next time ...

Katie 

Saturday 9 May 2015

Owl My Love Card


Hello ...

Today I want to share a card I have made using the Candy Collection and a couple of the Craft Asylum Sizzix Dies.

I'm really enjoying using the Candy collection for my spring crafting.  The colours are so fresh!


To create the card cover a card blank with the pink and blue patterned papers from the Candy 6 x 6" Paper Pad. Add a grey strip through the centre.  Die cut 2 circles from vellum and ink the edges.  Cut the Sizzix Craft Asylum Little Owl from the Candy 6 x 6" Paper Pad and adhere onto the vellum circles.  Die cut the Sizzix Craft Asylum Decorative Trim #2 and adhere to the base of the card.  To add the words die cut from various papers and glue around the circles.  Add a few hearts.


Great for any occasion or just to make someone smile! 

Have a great weekend.

Katie 


Monday 4 May 2015

A candy box and mini card


Nowadays one of the best presents are gift cards or vouchers. But unlike a physical present sometimes it is hard to feel proud of giving one away. Some come in envelopes or plain boxes, so here you have a simple idea on how to decorate it.


I used: Craft Asylum Candy 12"x12" Paper Pad, Craft Asylum Candy 6"x6" Paper Pad, Sizzix Thinlits Die Set 2PK - Decorative Trim; a Big Shot die cutting machine, white card, self adhesive crystals and adhesives.


For the box, I die cut the chevron using the different plain papers from the 6 x 6 pad and the decorative trim die. Then glue them on the box. Take the ready die cut elements (label, heart, message) and glue them down. Finally added the crystals.


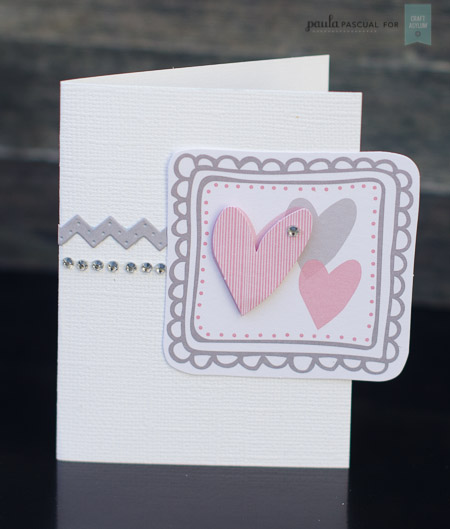
And since a present without card is rather sad, I had to make a mini card. I simply folded a piece of white card in half, attached a left over of the chevron from the box for the left bit of the card, then a strip of crystals. Finally I added the ready die cut elements (label, heart) and glue them down overlapping ver the edge.

So, next time you give a gift card, make sure you decorate the box or envelope!

Saturday 2 May 2015

A Little Meadow Sweet Home Decor


Hello ...

Are you like me and every now and then fancy adding a little home decor to brighten up the place?

Last week whilst food shopping I came across this mini urn.  It was cute but I knew with a little help it could be even cuter! 


The Meadow Sweet Collection was perfect for this as the colours complemented it beautifully.  So I added a couple strips of patterned paper from the Meadow Sweet 12 x 12" Paper Pad to wrap around the urn.  I then used the floral element and added a brad from the Meadow sweet Embellishment Set.


To add a bit more detail I attached two birds to wooden sticks and added them to the flowers.  


Finally I adhered the bunting around the top to really set off the colours.


The finished result is really bright and cheerful and will take pride of place brightening up the living room!


Craft Asylum makes such easy work for up cycling home decor items.  The colours and patterns are sure to brighten any room! 

Have a great weekend.

Katie